2.5.4. 带有 Order 列表的自定义编辑界面
按照下面的步骤在 Customer 编辑界面展示 orders 列表:
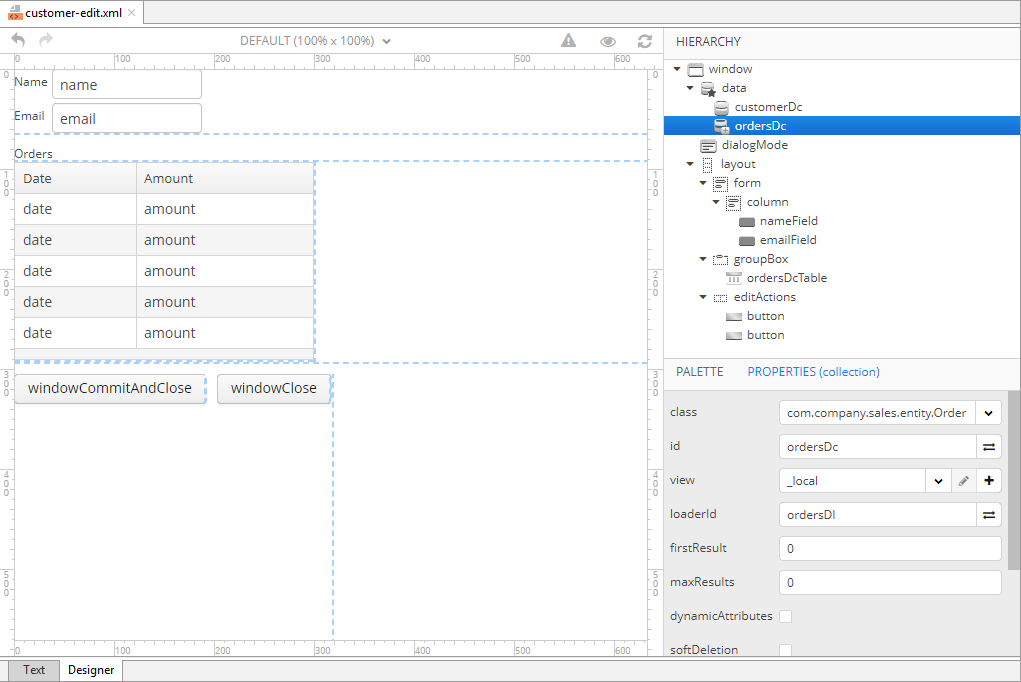
在 CUBA 项目树切换到 Generic UI 部分。打开 customer-edit.xml 进行编辑。
切换到 Designer 标签页。
在工具箱(palette)的数据组件分组中找到 Collection。将这个组件拖拽至组件树面板的 data 部分。
为数据容器选择 com.company.sales.entity.Order 实体及其 _local 视图。用  按钮生成加载器 ID。
在生成的查询语句中添加 WHERE 从句,选取关联到编辑的用户的 orders:
select e from sales_Order e where e.customer = :customer最后,会得到一个在 customer-edit 界面 XML 描述中加载 Order 实例的数据容器:
<data>
    <instance id="customerDc" class="com.company.sales.entity.Customer" view="_local">
        <loader/>
    </instance>
    <collection id="ordersDc" class="com.company.sales.entity.Order" view="_local">
        <loader id="ordersDl">
            <query><![CDATA[select e from sales_Order e where e.customer = :customer]]></query>
        </loader>
    </collection>
</data>
从工具箱将 Table 组件拖至组件树面板,放置在 label 和 editActions 中间。在组件结构(Hierarchy)面板选中此组件,然后在 Properties 标签页设定表格的大小:在 width 字段设置 300px,在 height 字段设置 200px。从可用的数据容器中选择 ordersDc。然后使用 id 字段边上的 按钮来生成表格的标识符:ordersTable。
接下来,右键点击表格并选择 Wrap Into > Group Box。切换到 group box 属性面板的 Properties 标签页然后在 caption 字段输入 Orders 并设置 group box的宽度为 320 px。
|
如果应用程序需要使用多国语言,用 caption 字段旁边的 |

最后,Text 标签页的 customer-edit.xml 代码如下:
<?xml version="1.0" encoding="UTF-8" standalone="no"?>
<window xmlns="http://schemas.haulmont.com/cuba/screen/window.xsd" caption="msg://editorCaption" focusComponent="form"
        messagesPack="com.company.sales.web.customer">
    <data>
        <instance id="customerDc" class="com.company.sales.entity.Customer" view="_local">
            <loader/>
        </instance>
        <collection id="ordersDc" class="com.company.sales.entity.Order" view="_local">
            <loader id="ordersDl">
                <query><![CDATA[select e from sales_Order e where e.customer = :customer]]></query>
            </loader>
        </collection>
    </data>
    <dialogMode height="600" width="800"/>
    <layout expand="editActions" spacing="true">
        <form id="form" dataContainer="customerDc">
            <column width="250px">
                <textField id="nameField" property="name"/>
                <textField id="emailField" property="email"/>
            </column>
        </form>
        <groupBox caption="Orders">
            <table id="ordersDcTable" dataContainer="ordersDc" height="200px" width="300px">
                <columns>
                    <column id="date"/>
                    <column id="amount"/>
                </columns>
            </table>
        </groupBox>
        <hbox id="editActions" spacing="true">
            <button action="windowCommitAndClose"/>
            <button action="windowClose"/>
        </hbox>
    </layout>
</window>
打开 CustomerEdit 界面控制器。左边栏的  和
和  按钮用来在界面描述器和控制器之间快速切换。
首先,我们需要禁止界面自动加载数据,因为我们需要自定义数据加载的过程。从类上删除 @LoadDataBeforeShow 就可以禁止自动加载数据了。
在控制器类中注入 orders 数据加载器,可以在类定义中按下 Alt+Insert 然后选择 ordersDl。或者可以手动输入以下代码:
@Inject
private CollectionLoader<Order> ordersDl;
然后,订阅 BeforeLoadDataEvent 事件,为 ordersDl 数据加载器设置 customer 参数:按下 Alt+Insert 然后在 Generate 菜单中选择 Subscribe to Event > BeforeShowEvent。或者,也可以直接使用下面的代码:
@UiController("sales_Customer.edit")
@UiDescriptor("customer-edit.xml")
@EditedEntityContainer("customerDc")
public class CustomerEdit extends StandardEditor<Customer> {
    @Inject
    private CollectionLoader<Order> ordersDl;

    @Subscribe
    protected void onBeforeShow(BeforeShowEvent event) {
        ordersDl.setParameter("customer", getEditedEntity());
        getScreenData().loadAll();
    }
}
这个方法将负责加载关联的 Order 实例。